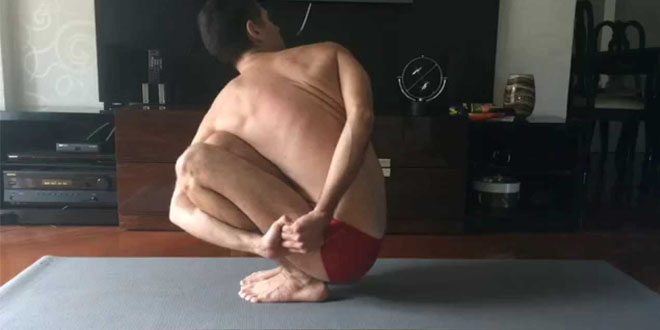
Mastering the noose pose
Commonly referred to as the pasasana pose, it is a position that is advised for advanced or intermediate yogis. The word, pasa, stands for a tie, cord, bond, noose, fetter or trap.
Here is a step-by-step guide towards achieving this pose effectively.
STEP 1
Start off with standing in the mountain pose known as Tadasana and position yourself next to a wall with the hip and feet width parallel to each other. Preferably, you would want to stand an arm’s length distance from the wall. After achieving the mountain pose position, turn to the right and push the palmar surface against the wall from the elbow to the wrist and your arms should be parallel to the floor. Now adjust your position to turn your chest to the center.
STEP 2
The next step would be to move into the squatting position by bending your knees until you achieve the mantle of sitting your hind side onto your heels. If possible, try placing the soles of your feet onto the floor and, if needed, place a towel below for added comfort.
STEP 3
Swing over your knees to the left side and as you exhale; at the next breath, turn your trunk to the right side while pressing against the wall. Now, as your left side presses against the wall, exert force on your elbow to move outside of your right knee. Use your right hand to stabilize yourself in this position and leverage yourself. To achieve the complete pose, you need to lock any open space between your left thigh and chest. Work the backside of your left arm down towards the leg and then work on the left shoulder towards the right knee.
STEP 4
Press your arms and knees inflexibly against each other and use the pressure this creates to increase the length of your trunk outside the groins. Slide along the superior surface of your thighs, but be careful as there is a high chance of deeply twisting your ankle – so keep the abdomen loose.
STEP 5
Bring both palmar surfaces against each other and keep the elbows angled away from each other and utilize the pressure this creates to increase the twist.
STEP 6
If you followed all the steps properly, then you are currently in the noose pose. Maintain the asana for a minute and then release.
In this pose you, start in a standing position, preferably an arm’s length from a wall, next you squat and move onto a highly sophisticated sequence of moves to attain the noose pose. Try this at home and see the results for yourself!